Find information that will help you decide between the best and cheapest sanders on the market. We show you prices of the cheapest and on offer.
BRANDS


TYPES


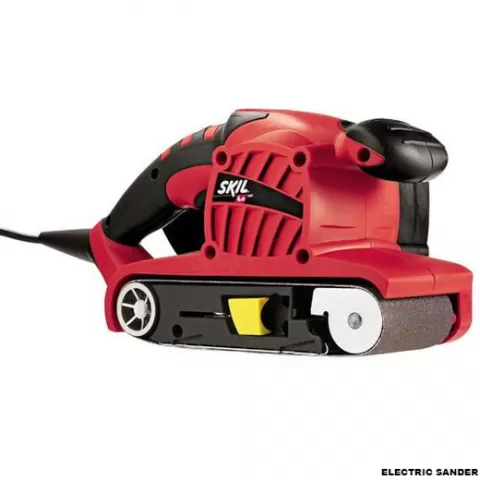
Electric Sander Definition
It is a machine that reproduces the elliptical movement made with a manual sanding, the sanding machines use a dry sanding process in which the dust generated during the operation is absorbed through the holes that have both the sandpaper and the sander itself.
Features
Oscillation: the oscillating motion of sanders is always in the same direction; micro-oscillation is often confused with vibration.
Elliptical movement and rotation: the sandpaper disc rotates as it moves in an elliptical pattern. This elliptical motion is associated with random orbit sanders.
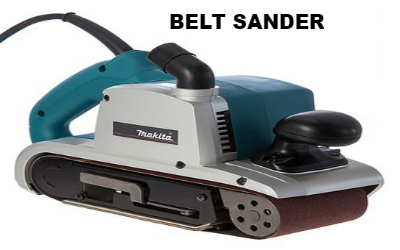
Reciprocating: The motor on a belt sander vibrates in an alternate motion, running the sandpaper attached to a rectangular base in a straight line, backwards and forwards.
Electric Sander Brands you Find in our Online Store
Evaluate Makita, Dewalt, Bosch, Black and Decker, Einhell, Tacklife, Korman, Vida XL brands.
And other brands such as Builder, EinHell, Far Group. Fox, Hitachi, Ryobi, Stayer, Worx, Dexter, Redstone, AEG.
Electric Sanders Models or Types
You can also find the most versatile and functional sander models on our website, which specialises in these wonderful tools.
The most commonly used types include belt sander, hand sander, wall sander, eccentric sander, giraffe sander, orbital sander, wood sander, mouse and delta sander. You will find all of them browsing through our online store
Electric Sander Advantages
The main advantages of using sanding machines are:
- Save time and effort during the sanding process, high productivity.
- Allows dry sanding with absorption and deposition of dust generated.
- Allows good quality surface finishes to be obtained.
Disadvantages of the Sander
- The main disadvantage is the difficulty that these machines present for sanding in areas of difficult access and edges, where it is necessary to sand by hand.
- During use it is very important that the sander always works on the surface and does not press hard, as it causes the sander to work at less rpm and reduce the life of the sandpaper, as it has to use too much sandpaper and increase the sanding time.
How to Use an Electric Sander ?
- Before turning on the sander, make sure the cable is out of the way. Your goal is to make fluid passes over your material.
- If you’re worried about sucking the cable into a rotating belt, or taking one hand off the machine to move the cable, you won’t be a good operator.
- Sand the board by moving the sander back and forth in the same direction as the grain. At the end of each stroke, move more than half the width of the platen to begin the next long stroke.
- Each sanding pass must overlap the previous pass. There is no need to lean on the sander. Just let the weight of the machine do the job.
How To Make A Home Sander ?
Things you need
- Electric drill 12V
- Some metal leaf (I used an old box of sweet cookies)
- Sandpaper (You can use any grain, but for the removal of metals and materials, use 100,200 or 300 grains)
- Old toy wheels and a steel rod. You can use a steel rod that comes as an axle for the same wheel. I used an old fabric hanger and a toy train wheel.
- Now cut the metal sheet into a circle, slightly larger than the wheel. Cut the sandpaper to the same size. Keep the diameter around 2-3 inches according to your requirements.
- Attach the wheel with the steel rod to the metal plate. Just use glue to glue the two together. Be sure to mark the center before doing this.
- Now cut the sandpaper into a circle just like the sheet metal. Use thin double-sided tape to attach it to the metal plate as it can be reused, or just use any adhesive.
- Start sanding. The drill is a little low in power, but it does the job, without spending extra money. Just change the sandpaper when it runs out!
What is a Sander and what are the Advantages of Using Electric Sanders and Hand-Held Sanders ?
A sander is an abrasive hand or power tool used to wear rough or uneven surfaces. This is achieved through the use of a thick sheet of paper covered with sand, called sandpaper, which is attached to the base of this tool. Here we list some of the advantages of their use:
- They are used to water or eliminate materials.
- Their purpose is to smooth rough and uneven surfaces or remove unwanted coatings, wearing down rough or uneven materials through the abrasion process.
- The sander moves back and forth smoothing the surface area. This is done in a continuous motion, along the surface to be sanded.
- The abrasive particles of the sanding paper used by the sander wear the surface and remove any unwanted or uneven material, resulting in a smooth, clean surface.
- These qualities mean that it is an essential tool for many people and the most obvious reason is that it allows you to do much more work in less time than if you did with hand sandpaper.
- That is why it is so purchased and used in countries such as the United States, Canada and Spain. The advantages of its use do not end here, we can also highlight the following:
- Sanders can be used on a wide variety of materials, such as wood; synthetic board, MDF, particle board, plywood, metal, plastic, plasterboard and many more.
- They are used both by DIY enthusiasts and traders, who commonly use a hand sander. Examples are plasterers and decorators.
- Sanders ensure that a surface is sanded flat and evenly, and avoid possible injury to the user’s hand.
- Better finishes: There is a wide range of sanding machines, all adapted to different tasks, with them you will achieve the best finishes.
- Used for working with different materials: There are different models such as wood sanders. wall sanders. belt sanders, orbital sanders, hand sanders and pneumatic sanders with which you can do work and finishes in wood and metal with a high level of quality and efficiency.
- They are safe and avoid injuries to your extremities: Hand sanding is a thing of the past, if you want to avoid permanent injuries to your hands and arms use the new models of sanding machines 2018.
The Most Suitable Electric Sander
The right sander can make your job or project easy, fast and very effective.
Since sanding is a repetitive activity, it makes sense for an electric sander to save time and leave a better finish than if you tackled the job by hand.
Power sanders can help with many projects, including decks, furniture and shelves. They can be hand-held or table-mounted, powered by electricity, air compressors or batteries.
Among the various electric sanders are the belt sander, delta sander and orbital sander.
The most important brands are bosch sander, dewalt sander, black and decker sander and makita sander. You can also find them in electric sander leroy merlin shop.
Electric sanders are available that move sandpaper over surfaces in various patterns. Belt sanders rotate a continuous abrasive belt; disc sanders rotate the flat abrasive disk in a circular pattern; drum sanders rotate a cylindrical abrasive surface; and vibrating sanders move abrasive material back and forth in short movements. Wooden floor sanders are disc or belt sanders with powerful motors. Remember that here, in our online store, we have the cheapest and best deals,
Other Uses You Can Give to Sanders
Many tasks can be completed with a sander. These include:
- Gypsum panel sanding: A hand or power sander can be used to sand walls and ceilings. A user may wish to sand their walls or ceilings to even out the surface. This can be done to prepare for wallpaper application or to remove any imperfections caused by the paint or filler.
- Furniture Sanding: Can be used to smooth and shape furniture parts, such as the surface of a table or the legs of a chair.
- Sanding joints: A sander can be used to smooth rough joints. When a joint protrudes slightly or is irregular, it can be useful to remove any unwanted material and make the joint fit perfectly.
- Removing coatings: Removes coatings of paint or varnish. It can also be used to remove unwanted coatings or layers, such as varnish, paint or dust, from an object.
- Rubbing: A good, inexpensive hand sander can be used to rub old coatings and paint before repainting. This is essential to ensure that the new coat of paint adheres to the old coat.
- Thousands of small scratches, introduced into the surface by the abrasive action of sanding, hold the new coat of paint to form a secure bond. It is also necessary to rub between coats of varnish to obtain a high quality finish.
How to Use it Safely?
To safely use an electric sander, you must first choose the most suitable one for the type of work you are going to do. Belt sanders are used for larger surfaces with vibratory sanders that improve the finish. Disc and drum sanders are useful for smaller surfaces. Then you must select the abrasive material. Flint is used in common sanding materials, garnet is for hardwoods, emery and other materials are used for metal. Abrasivity is reduced with the use of sandpaper. Always use eye protection and breathing protection when sanding.
How to do Maintenance?
Sanding blocks require no maintenance beyond replacing sandpaper when it is no longer abrasive. Electric sanding machines require extra care to keep the engine and other moving parts moving. Because sanding machines develop fine wood dust, periodically clean the sander so that dust does not damage the engine. For that you can use soft cloths that you can find in any convenience store.
The Best Sandpaper to Use
The «grade» (or sand) of abrasive paper (sandpaper) refers to the size of the abrasive particles it contains and is identified by a number. A lower number will be used for coarse sanding, a higher number indicates that it is intended for final sanding.
Grit papers 30 and 60 are used for rough sanding. 100 to 150 grit sandpaper is for medium sanding.
and 220 grit sandpaper is used to sand the finish. Of course, this changes with the type of wood and whether the sanding is done by hand or with a machine.
Sanding soft wood with sandpaper can break the fibers of the wood (the grain). Sanding perpendicular to the wood fibers could also tear the wood fibers. When the fibers are torn, they rise from the surface. Another way to cause the «grain to rise» is to wet the wood too much. The best way to determine which grit to use is to test it.
Electric Sander For Cars
When it comes to repairing sheet metal and paint in the workshop, one of the essential steps to achieve a good finish is sanding the parts as a step prior to the painting phase.
The types of sanding machines that can be used for this task are: electric, pneumatic and manual. On the other hand, according to the type of sandpaper used, the machine makes a different movement and is suitable for one job or another.
Thus, for example, the rotary machine rotates on a central axis, making a circular movement at high speed. Also known as radial, is often used to sand surfaces with great power of abrasion, especially metals, stresses the post.
Likewise, orbital sanders can be found for work with putties, since their axis rotates elliptically, which imitates the movement of the hand when sanding.
On the other hand, experts point out that the roto-orbital type is the most used because it combines the best of the rotary and orbital, and adapts to almost all types of surfaces.
As for the type of sandpaper, the belt type is particularly suitable for polishing flat surfaces. On the other hand, the delta type, smaller and incorporating a small triangular plate where the sandpaper is placed, are suitable for reaching small nooks and crannies and areas where it is not possible to reach with other machines.
Finally, there are sanders with different shapes (circular, square and rectangular) and multifunction (with interchangeable discs to use different sandpapers).
Polishing with Electric Sander
The orbital sander provides fine, uniform and regular sanding on flat surfaces. This tool has a polishing surface that makes elliptical movements that allow precise and quality finishes.
In the operation of this machine there is no need to exert pressure, it is enough to guide its displacement.
As with manual sanding, when an electric sander is used, it is best to start work with a coarse-grained paper, which will be replaced by finer-grained paper as the polishing task progresses.
If an electric sander is used, care must be taken with vibrations, as they can damage the structure. In the operation of this machine it is not necessary to exert pressure, it is enough to guide its displacement. Do not leave the sander in operation on the same point, because the wood would suffer the consequences.
Another precaution to take into account is that electric sanding machines are designed to work on flat surfaces, so when sanding a piece of furniture with moldings is necessary to use manual sanding.
Electric Sander for Cabinets
Before painting, varnishing or dyeing any piece of furniture, it must be sanded. To sand small surfaces that have a flaw, a stain from a glass or a cigarette burn, you can wrap a round ribbon with a strip of sandpaper. In the case of flat surfaces, wrap the sandpaper in a rubber or cork block and pass through the area gently. This same block serves to perfectly bevel the edge of a board. An abrasive pad should be used for sanding the mouldings. If the surface is large, an orbital electric sander can be used.
How to Sand Wood with ELectric Sander
The best option for sanding wood is to do it by hand. The thickness of the sandpaper grains must be taken into account: the coarser grains are more abrasive and are used for the first job on unbrushed surfaces or to remove old paints, the medium grains are suitable for the first refinement of smooth surfaces and the finer grains are suitable for delicate rework.
Once the most suitable sandpaper has been selected for the surface and work to be carried out, the piece begins to be polished. In order not to leave marks, the sandpaper must be moved along the grain.
When sanding a surface, the polish must be homogeneous. To achieve a finish without irregularities, the sandpaper should be held in the palm of the hand. Another option is to use a wooden or plastic block on which to wrap the sandpaper.
If the furniture has profiles or moldings, the task will be easier if the sandpaper is wrapped in a soft support.
If the furniture has profiles or mouldings, the task will be easier if the sandpaper is wrapped in a soft support. A piece of foam can be used for this task, as this material adapts to the surface of the wood. After the first sanding, a finer sanding should be carried out with a paper with a smaller grain size.
During the sanding process it is advisable to change the sanding paper frequently in order to prevent wood residues between the granules from scratching the surface.
After sanding, the resulting dust is cleaned with a vacuum cleaner and then a damp cloth is wiped over the surface.
How to Prepare the Roof for Painting
Ceilings, as well as walls, need to be prepared before painting. Cracks, badly adhered paint, flakes… must be repaired so that the final result is perfect.
What do you need?
Materials
- Crack repair paste
- Anti-mould cleaner (optional)
- Cleaner degreaser (optional)
- Fixing primer
- Tools
- Bodybuilder spatula and spatula
- Water sprayer
- Rollers
- Palette
- mini sandpaper or electric sander
- Trimming Brushes
- Bodybuilder Tape
- Protective paper tape
- Protective plastic
- Cleaning cloths
- Domestic ladder
- Telescopic handle (optional)
- Gloves
- Protection for clothing
- A hat to protect the hair
- Security elements
Always wear protective goggles and a simple mask to avoid breathing in sanding dust and getting it into your eyes.
Work planning
Check the state of the ceiling for cracks, chips, old plug holes used to hang lamps, etc. In the case of the kitchen, check if it has too much accumulated grease. In the case of the kitchen, check if it has too much accumulated grease; if so, it is advisable to clean the ceiling beforehand with a degreasing cleaner. If you detect mould in the bathroom, use an anti-mildew product to clean it.
Cleaning With a Degreaser
When it comes to preparing kitchen ceilings, it is important that you clean them with a degreasing product. The grease accumulated on the surface is the worst basis for the paste tapagrietas and then the paint. In any case, it is always advisable to apply a primer, which will act as a fixative of all products.
Step by step
Step 1. Cover the items that should not be stained with body tape and paper or plastic: furniture, window frames and doors and protect the floor. Remove the lamps from the ceiling. Previously you will have cut the light. If you can’t or you find it too complicated, cover them perfectly.
Step 2. If it is the kitchen ceiling and it is very dirty, clean it with a cloth and a degreasing product. If it is the bathroom, clean it with an antimold product.
Step 3. Clean the cracks before covering them with tapagrietas paste: with the edge of the spatula, scrape along, trying to open it slightly in the shape of V.
Step 4. Clean the crack with a dry brush to remove loose plaster and spray with water before applying the crack sealer paste.
Step 5. If you are repairing the roof of the kitchen, where grease is easily deposited, so that the crack does not reject the cracking paste, apply a coat of fixing primer with a palette and let it dry.
Step 6. Take a little pasta tapagrietas with the normal spatula and put it on the spatula of carrocero. Apply it to the crack perpendicular to it and longitudinally, with the spatula slightly inclined and removing product in each pass.
Step 7. Once the paste is dry, sand with a medium grit sandpaper block. If you have plugged a lot of cracks, it will help to use a mini electric sander. Don’t forget to put on your glasses to do this.
Step 8. When your roof is sanded and free of dust, apply a primer all over the surface. Do it with a roller and palette in the corners or next to the furniture. If the ceiling is unobstructed, you will find it more comfortable to use a roller attached to the telescopic handle.
Step 9. You have your roof ready to be painted.
Painting the ceiling
Unless you want to achieve an optical effect of greater or lesser height, we advise you to use white paint to paint your ceilings, as it will bring luminosity to the room. For kitchen and bathroom ceilings, at Leroy Merlin you have special paints: impervious to grease and mould, very resistant, durable and non-yellowing.
Image of Electric Sander